Admin How-To Guide
Authorize ChallengeRunner to Integrate with Webex
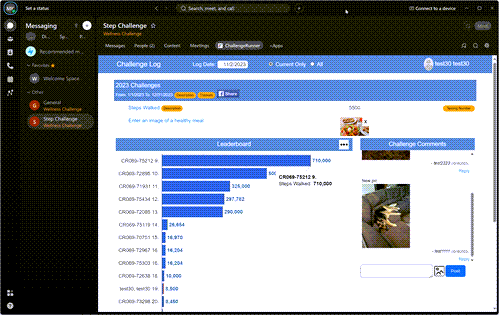
Webex is a pioneer and leader in the online meeting and collaboration space. In the modern workplace, where employees are distributed throughout time zones around the world, it is common to have the Webex app open 24x7 on PCs and smartphones. As an always-on, work-related application, Webex provides ChallengeRunner with the opportunity to build onto their platform so that those using Cisco Webex can easily use ChallengeRunner without switching context. In doing so, users can join challenges and teams, authorize trackers, view leaderboards, enter data, and more. The following steps are required to configure Webex integration:
How to authorize the ChallengeRunner app in Webex
- You must have already created a ChallengeRunner Commercial or Enterprise organization account before starting this process. Please see: New Organization to get started.
- If you have not already done so, create a Cisco Webex account. Alternatively, you may use an existing Webex account.
- Open the Webex desktop app and click the Messaging icon.
- Create a Webex space to handle challenge communications. You may use an existing space but may want an exclusive channel just for your wellness challenges.
- Click on the space name.
- Click the +App button in the top navigation of the space window and then search for ChallengeRunner.
- Click the ChallengeRunner tile and then click the Add to Tab button in the popup.
- Sign in with your ChallengeRunner admin account.
- The user page is the default in the Teams app. To create your first challenge as an admin, click the Switch to User View button. Then proceed to the Create A Fitness Challenge process.
- Once the process is complete, you should see ChallengeRunner listed in the Webex space top panel.
How to enable Webex incoming webhooks in ChallengeRunner
- Open the Webex application.
- In the lower left corner of the window, click the Apps icon. This action opens the Cisco Webex App Hub in a new tab of your preferred browser.
- Use the search bar to find Incoming Webhooks.
- Select Connect. This action opens an OAuth Authorization to allow the application in a new tab.
- Select Accept. The tab automatically redirects to the application's configuration page.
- Configure the following:
- Webhook name - Provide a name to identify the messages provided by this application.
- Select a space - Use the drop-down menu to choose a Space. The Space must already exist in Webex team. If a space does not exist, you can create a new space in Webex Teams and refresh the application's configuration page to display the new space.
- Select Add. The Webex Space you chose will receive a notification that the application is added.
- Copy the Webhook URL.
- Log into ChallengeRunner with the admin Id used to link with Webex.
- Select the Webhooks option from under the Organization menu.
- Click the Add button.
- Enter a Webhook Name and Channel / Space Name to associate with this webhook. You may enter any names you like.
- Paste the webhook URL from step 8 into the Webhook Url box.
- Click Save.
How to enable challenge updates through Webex
- NOTE: This process requires incoming Webex webhooks using the section above.
- Log into ChallengeRunner with the admin Id used to link with Webex.
- If you have not already done so, create a challenge using the Create A Fitness Challenge process.
- Click the Edit Challenge button next to the challenge name.
- Select the desired name and space from the Collaboration Channel drop down box.
- Choose either the Event Updates or Daily Leaderboards checkboxes.
- Click Save.
How to enable Webex automatic challenge enrollment
- Log into ChallengeRunner with the admin Id used to link with Webex.
- Select the Settings option from under the Organization menu.
- Click the No option next to Enable Group Page.
- Select option Automatically enroll members in available challenges during registration or login.
- Click Save.